User Management
Delete saved ship-to addresses from the address book
Where to find it: Storefront → My Account → Address Book
When you'd use this: Remove outdated or incorrect shipping addresses from your saved address book. Available for both B2B and B2C users.
What you need first:
- Active user account with login access
- Existing saved addresses in your address book
Using it day-to-day:
- Log into your storefront account
- Navigate to your Address Book
- Locate the address you want to remove
- Click the delete option for that address
- The address will be permanently removed from your saved addresses
When you delete an address, it's removed from all lists and dropdowns throughout your account, including the default ship-to address selector.
Troubleshooting:
- Delete appears successful but address remains — Refresh your browser page. If it persists, contact your administrator to verify you have the correct permissions for your account type.
Reset your password using email
Where to find it: Storefront → Login screen → Forgot password? link
When you'd use this: Regain access to your account when you've forgotten your password, without contacting support. Available for both B2B and B2C users.
What you need first:
- A registered account with a valid email address
- Access to the email inbox associated with your account
Using it day-to-day:
- On the login screen, click the "Forgot password?" link
- Enter your email address in the modal that appears
- Click submit
- You'll see a confirmation message: "If an account exists for that email, we've sent a reset link"
- Check your email inbox for a password reset message
- Click the "Reset your password" button in the email, or use the fallback link provided
- On the password reset page, you'll see the password requirements you need to meet
- Enter your new password and confirm it
- Submit the form
- You'll see a confirmation and can log in with your new password
The password reset link is single-use and expires after a set period. If you try to use an expired or already-used link, you'll see an error message with an option to request a new reset link.
The password reset page displays the password policy rules that apply to your account, so you can create a compliant password on the first attempt.
Troubleshooting:
-
No email received after requesting reset — Check your spam or junk folder. The confirmation message appears whether or not your email is registered, so verify you entered the correct email address associated with your account.
-
Reset link shows an error when clicked — The link may have expired or already been used. Click the "request a new link" option on the error page to generate a fresh password reset email.
Change your password while logged in
Where to find it: Storefront → Account → Profile → Change Password
When you'd use this: Update your password while you're signed in, without needing to log out or use the password reset email flow. Available for both B2B and B2C users.
What you need first:
- Active login session
- Your current password
Using it day-to-day:
- Navigate to your Account Profile page
- Locate the Change Password section
- You'll see the password requirements that apply to your account
- Enter your current password
- Enter your new password
- Confirm your new password by entering it again
- Submit the form
- You'll see a confirmation message that your password has been changed
- You remain logged in and can continue using the storefront
The password requirements displayed on the form match the rules enforced when you submit, so you know exactly what's needed before you create your password.
Troubleshooting:
-
"Current password incorrect" error — Verify you've entered your current password correctly. If you've forgotten your current password, log out and use the "Forgot password?" link on the login page to reset it via email.
-
Password rejected even though it appears to meet requirements — Check for hidden spaces at the start or end of your password. Verify you've included at least one character from each required category: uppercase letters, numbers, and special characters.
-
New password and confirm password don't match — Re-enter both fields carefully, ensuring they match exactly.
Receive a welcome email after B2C registration
When you'd use this: When you self-register as a B2C customer on the storefront, the system automatically sends a branded welcome email to confirm your account was created successfully. Available for B2C users only.
What you need first:
- A valid email address
- Successful completion of the storefront registration form
Using it day-to-day:
After you complete the registration form on the storefront:
- The system creates your account and sends a welcome email to the address you provided
- Check your email inbox for the welcome message
- The email includes your store's logo, your name, and a direct link to the login page
- Click the login link in the email to return to the storefront and sign in with your new credentials
The welcome email is sent automatically when your registration completes successfully. You don't need to request it or take any additional action.
Troubleshooting:
-
No welcome email received after registration — Check your spam or junk folder. Verify you entered a valid email address during registration. If you can still log in to your account, your registration was successful even if the email didn't arrive.
-
Login link in email doesn't work — Copy and paste the link into your browser, or navigate directly to the storefront login page and sign in with the credentials you created during registration.
Receive a welcome email when an admin creates your account
When you'd use this: When a store administrator creates a new user account for you in the admin, you automatically receive a branded welcome email with instructions on how to access your account. Available for both B2B and B2C users whose accounts are created by administrators.
What you need first:
- An administrator with user management permissions
- A valid email address for the new account
Using it day-to-day:
When an administrator creates your account:
- The system sends a welcome email to the address provided during account creation
- Check your email inbox for the welcome message
- The email includes your store's logo and your name
- If the administrator did not set a password for you during account creation, the email includes a secure password setup link
- Click the password setup link in the email (if present) to create your password
- The password setup link expires after 7 days
- Once you've set your password, you can log in to the storefront with your email and new password
If the administrator set a password for you during account creation, the welcome email confirms your account exists but does not include a password setup link. Contact your administrator to obtain your initial password.
The welcome email is sent automatically when your account is created. You don't need to request it.
Troubleshooting:
-
No welcome email received after account creation — Check your spam or junk folder. Verify with your administrator that they entered a valid email address during account creation. If you already know your password, you can log in directly even if the email didn't arrive.
-
Password setup link shows an error when clicked — The link may have expired (after 7 days) or already been used. Contact your administrator to request a new password setup link or ask them to use the "Forgot password?" link on the storefront login page to generate a fresh reset link.
Continue shopping after username changes
When you'd use this: When an administrator updates your username (email address) while you're actively logged in, you can continue browsing, adding items to cart, and completing checkout without interruption.
What you need first:
- Active storefront session with valid login
Using it day-to-day:
If an administrator changes your username while you're shopping:
- Continue using the storefront normally — you don't need to log out or refresh
- Browse products, add items to your cart, and proceed to checkout as usual
- Complete orders using either on-account payment or credit card
Your active session recognizes you by your unique user ID rather than your username, so the system continues to work without errors.
Troubleshooting:
- "User not found" error after username change — Refresh your browser page. Your session should automatically recognize your account by your user ID. If the error persists after refreshing, log out and log back in with your new username.
View customer details in the admin
Where to find it: Admin → Customers → ERP Customers
When you'd use this: Access detailed information about a specific customer account, including their customer code, linked users, ship-to addresses, and custom field values synced from your ERP.
What you need first:
- Admin account with customer read permissions
- The customer code or ID for the account you want to view
Using it day-to-day:
From the ERP customers list, search by customer code or name to find the account. Click "View detail" on the customer row to open their full record.
The customer detail screen shows:
- Details tab — General information (customer code, name, contact details), financial settings (credit limit, payment terms), billing address, and customer attributes
- Users tab — Linked store user accounts for this customer
- Ship-to addresses tab — Saved shipping addresses synced from your ERP
- Unavailable periods tab — Date ranges when orders to specific ship-to addresses are blocked
The system automatically loads complete account information when you access customer records, including credit limits, payment terms, and other ERP-synced settings linked to the customer code.
View custom field values:
The Customer attributes card on the Details tab shows custom field values synced from your ERP. These read-only fields are grouped by source (Webstore, Business Central, PIM) and include field name, description, and current value for each attribute.
Use the "Filter attributes" search box to find specific fields. Expand or collapse attribute groups to focus on the information you need.
Troubleshooting:
-
500 error when viewing customer details — Verify that the customer ID exists in your system. For guest users or non-existent customer IDs, the system returns an appropriate error message rather than detailed account information.
-
"Customer code is required" error when viewing cart — Log out and log back in. This refreshes your session and reloads your linked customer account information. If the error persists after logging back in, verify with your administrator that your user account has a default AR customer assigned in Admin → My Profile.
Switch between customer accounts on desktop
Where to find it: Storefront → My Account dropdown (top right)
When you'd use this: Switch between customer accounts when you have access to multiple business accounts. Available for B2B users only.
What you need first:
- B2B user account with login access
- Multiple customer accounts assigned to your user
Using it day-to-day:
- Click on your name or the My Account dropdown in the storefront header
- Look for the customer code and company name row, which displays your current customer account with a building icon
- Click on the customer code and company name row to open the switch customer popup
- Your current customer appears first in the list and is highlighted
- Select a different customer account from the list
- The page refreshes and you're now browsing and ordering as that customer account
The system only fetches your available customer accounts when you open the switch customer popup, not on every page load. If your user group settings don't allow switching customers, the popup won't load customer options.
When you switch customer accounts, all pricing, product availability, order history, and saved addresses update to reflect the selected customer's account settings.
Troubleshooting:
-
Customer row appears but popup doesn't open — Verify that your user group has the switch customer setting enabled. Contact your administrator if you need access to switch between customer accounts.
-
Only one customer appears in the list — Your user account is linked to a single customer. If you need access to additional customer accounts, contact your administrator to add them to your user profile.
Change your default customer account and delivery address on mobile
Where to find it: Mobile storefront → Hamburger menu (top section)
When you'd use this: Quickly switch between customer accounts or change your default delivery address while browsing on mobile. Available for B2B users only.
What you need first:
- Mobile storefront access with login
- Multiple customer accounts assigned to your user (for switching customers)
- Saved shipping addresses in your account (for changing delivery address)
Using it day-to-day:
- Open the hamburger menu on your mobile storefront
- At the top of the menu, you'll see your current customer account and delivery address
- Tap on the customer account to select a different customer from your assigned accounts
- Tap on the delivery address to choose a different default shipping address
- Your selection applies immediately to your browsing session and checkout
The system validates that any delivery address you select belongs to the customer account you're currently using. If you switch customer accounts, your delivery address options will update to show only addresses available for that customer.
Troubleshooting:
- Address doesn't appear in the delivery options — The address must belong to your currently selected customer account. If you recently switched customers, only addresses associated with that customer code will be available. To use an address from a different customer account, switch to that customer first, then select the delivery address.
Create an account that meets password requirements
Where to find it: Storefront → Registration form or password setup page
When you'd use this: Create a password that meets your store's security requirements when registering a new account or setting up your password for the first time. The system shows you the password rules before you submit so you can create a compliant password on the first attempt.
What you need first:
- Access to a registration form or password setup link
Using it day-to-day:
When you create a new account or set up your password:
- On the registration or password setup page, you'll see the password requirements that apply to your account
- The requirements typically include minimum character count, uppercase letters, numbers, and special characters
- Enter a password that meets all the displayed requirements
- The system validates your password against the requirements when you submit
- If your password doesn't meet the requirements, you'll see an error message explaining which rules weren't met
- Adjust your password and submit again
The password requirements displayed on the form match the rules enforced when you submit, so you know exactly what's needed before you create your password.
New stores include a default password policy that requires at least 8 characters with at least 1 uppercase letter, 1 number, and 1 special character. Your administrator can customize these requirements for different user groups.
Troubleshooting:
-
Password rejected even though it appears to meet requirements — Check for hidden spaces at the start or end of your password. Verify you've included at least one character from each required category: uppercase letters, numbers, and special characters.
-
Password requirements don't appear on the registration form — Your user group may not have a password policy configured. Contact your administrator if you need clarity on password requirements.
Sync customer contacts to HubSpot
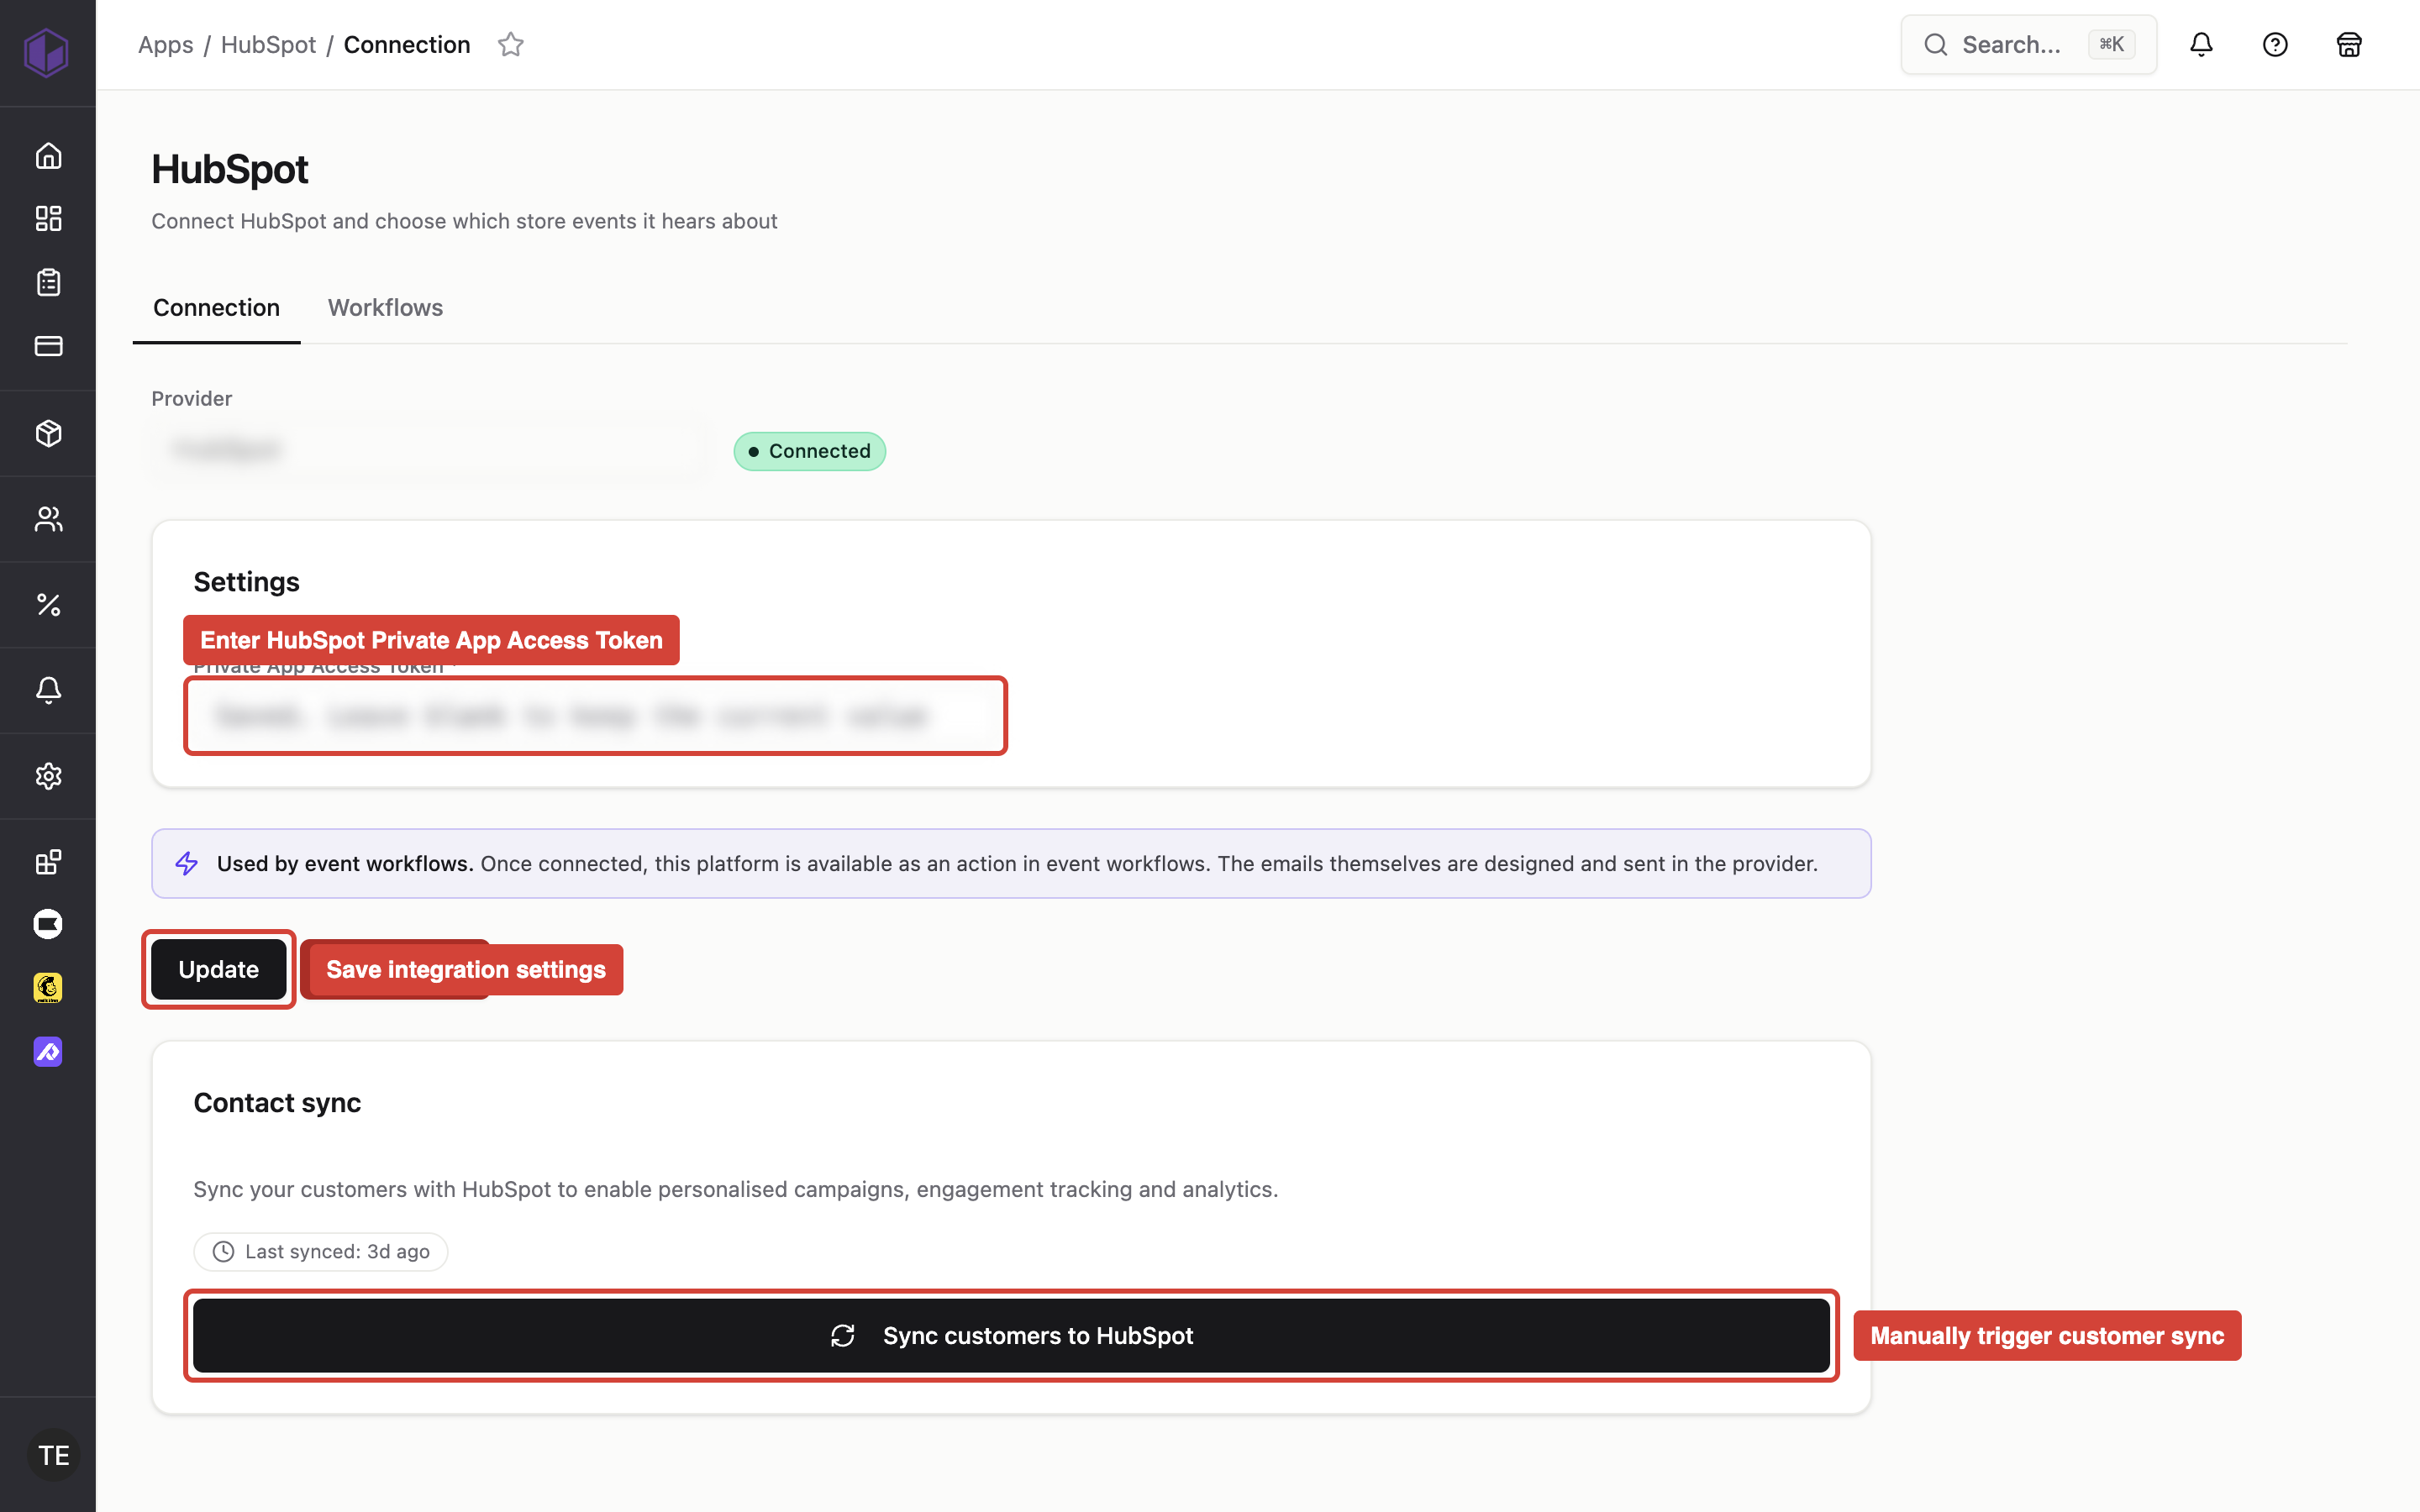
When you'd use this: Automatically create and update HubSpot contacts when B2C customers register or when any user information changes on your storefront. This keeps your HubSpot CRM in sync with your store's customer data for marketing and customer relationship management.
What you need first:
- HubSpot account with API access
- HubSpot integration configured in your notification service
- Admin permissions to configure third-party integrations
Set it up:
Configure the HubSpot integration in your notification service settings. Once enabled, the system automatically creates HubSpot contacts for new B2C customer registrations and updates existing contacts when user information changes for both B2B and B2C users.
Using it day-to-day:
The system handles HubSpot synchronization automatically:
- When a new B2C customer registers on your storefront, the system creates a corresponding contact in HubSpot with their email and profile information
- When any user (B2C or B2B) updates their profile, the system updates the matching contact in HubSpot
- Each contact is linked using a unique identifier that maintains the connection between your store and HubSpot
You don't need to manually trigger syncs or exports — the system processes these updates in real-time as users register and update their information.
Troubleshooting:
-
Contact not appearing in HubSpot after customer registration — Verify the customer's email address is valid and properly formatted. If HubSpot reports authentication errors, check that your HubSpot API credentials are current and have the correct permissions to create contacts.
-
Profile updates not syncing to HubSpot — Check that the contact still exists in HubSpot and that your integration credentials are valid. Authentication errors will prevent updates from completing.
Sync customer contacts to Klaviyo
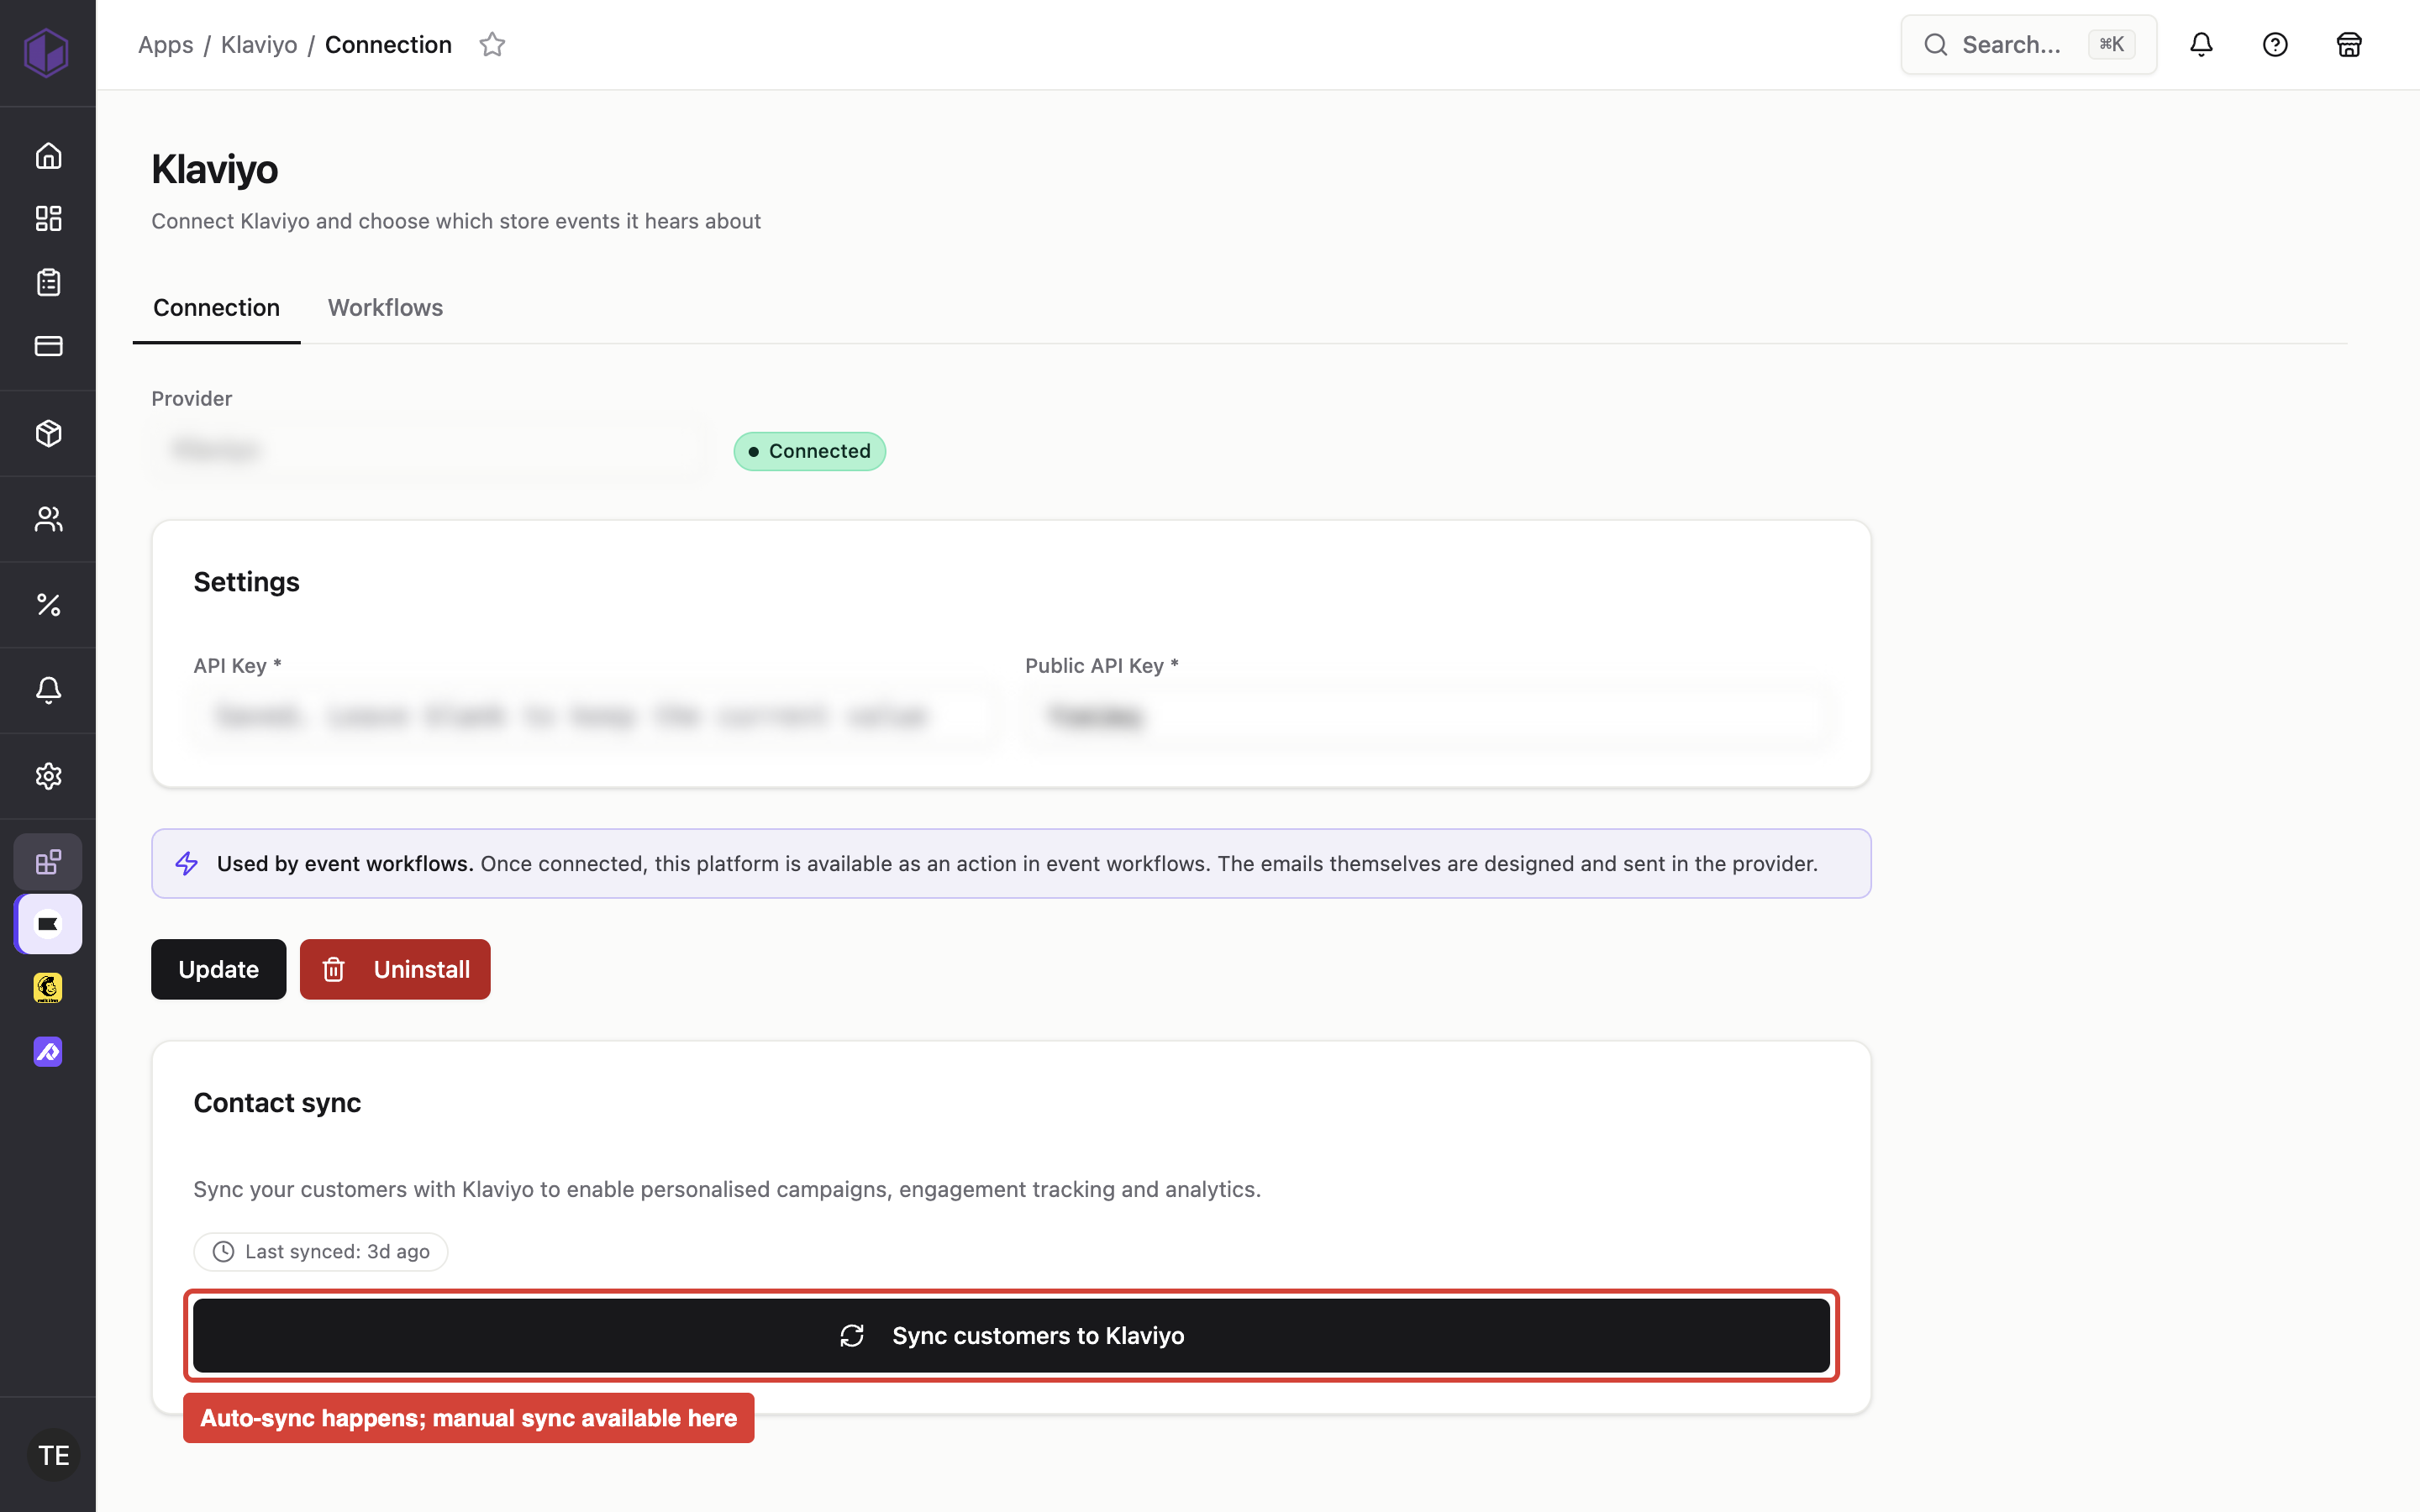
When you'd use this: Automatically create and update Klaviyo profiles when customers register or when user information changes on your storefront. This keeps your Klaviyo marketing platform in sync with your store's customer data for email campaigns and customer segmentation.
What you need first:
- Klaviyo account with API access
- Klaviyo integration configured in your notification service
Set a minimum order value override for a customer
Where to find it: Admin → Customers → Edit Customer
When you'd use this: Override the standard minimum order value for a specific customer account. You can set a custom minimum or remove the minimum order requirement entirely for that customer.
What you need first:
- Admin account with customer edit permissions
- The customer account you want to configure
Using it day-to-day:
- Navigate to the customer record in the admin
- Locate the minimum order value override checkbox
- Check the override box to enable a custom minimum for this customer
- Enter the minimum order value amount, or enter 0 to remove the minimum order requirement for this customer
- Save the customer record
When you enable the override:
- The value you enter takes priority over both the ERP-synchronized value and your site's global minimum order setting
- Setting the override to 0 means the customer has no minimum order value requirement — they can place orders of any size
- The minimum order value you configure applies immediately to the customer's checkout and order editing
Troubleshooting:
- Override saves but standard minimum still applies at checkout — Verify that the override checkbox is ticked and saved. The override only takes effect when the checkbox is enabled. If the checkbox is off, the system uses the ERP value or site default instead.
Import and export user access groups
When you'd use this: Bulk import or export user account data including supervisor access group assignments. Useful when setting up multiple supervisor users or migrating user configurations between environments.
What you need first:
- Admin account with user management permissions
- User import file with properly formatted data (for imports)
Using it day-to-day:
When you import users with access group data:
- Prepare your user import file with user group assignments and access group information
- Upload the import file through the admin user import tool
- The system creates or updates user records and applies the specified access group assignments to supervisor users
- Review the import results to confirm successful processing
When you export users:
- Select the user group or filter criteria for the users you want to export
- Run the export from the admin
- The export file includes user access group assignments along with standard user data
- Use the export file for record-keeping, bulk updates, or migration to another environment
The system automatically handles access group assignments for users in supervisor user groups during both import and export operations.
Troubleshooting:
-
Access groups not importing for supervisor users — Verify that the user group assigned to each user is configured as a supervisor group in your system. Access group assignments only apply to users in supervisor user groups.
-
Import succeeds but access groups missing — Check that your import file includes the access group data fields and that the access group ID in the file match existing groups in your system.
Edit B2B and B2C user accounts in the admin
Where to find it: Admin → Store Users (v5 admin) or Admin → Users (v4 admin)
When you'd use this: Create and manage user accounts for your storefront. B2B users have access to customer accounts and on-account ordering, while B2C users shop as individual consumers. The admin displays dedicated edit screens tailored to each user type.
What you need first:
- Admin account with user management permissions
- For B2B users: at least one ERP customer account to link the user to
- For B2C users: basic profile information (name, email, password)
Using it day-to-day:
When you create or edit a B2B user, the admin shows fields relevant to business users:
- Link the user to one or more ERP customer accounts — the first customer you link becomes the primary account
- Assign the user to a user group that controls permissions and access levels
- Set whether the user can access all customers or only their linked customers
- Configure warehouse assignments, region, department, and interface language
- Set order receipt email addresses for order notifications
- Disable the user to block login without deleting the account
When you create or edit a B2C user, the admin shows fields relevant to individual shoppers:
- Personal information including first name, last name, birthday, and gender
- Email and password credentials
- Contact information and shipping address
- Convert a B2C user to a B2B customer account if their business needs change
The system stores gender information in a flexible format that works with both older and newer admin versions. Gender values can be entered as FEMALE, MALE, or left undefined.
When you create a B2C user through the admin, the system automatically assigns the store's default public warehouse to the account. B2B users specify their own warehouse during account creation.
Troubleshooting:
-
B2B user saves but customer link is missing — Verify that you selected at least one customer code from the linked customers list. B2B users require a linked customer account to access on-account ordering features.
-
B2B user creation fails with "warehouse required" error — Enter a warehouse code for the B2B user. B2B users must have a warehouse explicitly assigned during account creation.
-
B2C user creation fails when store has no default public warehouse — Contact your system administrator to configure the store's default public warehouse setting. B2C users require a valid default warehouse to be created through the admin.
-
Changes to user save successfully in one admin version but not another — The system accepts gender and scope values from both v4 and v5 admin versions. If you see validation errors, check that required fields for the user type are complete — B2B users need a user group, while B2C users only need basic profile information.
Restrict users to transactions for specific ship-to addresses
When you'd use this: Limit B2B users to view only invoices and transactions