Placing Orders
Prevent duplicate orders from a single checkout
Where to find it: This protection works automatically in the background during checkout — no configuration needed.
When you'd use this: Every time a customer completes checkout on your web store. This prevents accidental double-charges if a customer clicks "Place Order" multiple times or if network issues cause the checkout request to be sent twice.
What it does:
When a customer authorizes payment and submits their order, CommerceBuild ensures that only one order is created, even if the checkout process is triggered multiple times within the same second. The platform checks the payment authorization status before creating an order — if the payment has already been authorized, captured, cancelled, or failed, the duplicate request is rejected automatically.
Each checkout attempt receives a unique correlation ID, and the platform verifies that the payment authorization reference hasn't already been used to create an order.
If a customer's card is declined during checkout (for example, due to an incorrect CVV), they can correct their payment details and submit again using the same checkout session. The platform allows retry attempts until the payment is successfully authorized.
Using it day-to-day:
- Only one order appears in your Order Queue, even if the customer experienced a slow connection or clicked submit multiple times
- The order shows a single pre-authorization reference from your payment processor
- No duplicate charges appear on the customer's payment method
Add comments to orders and line items (Sage 300)
When you'd use this: When your store is integrated with Sage 300 and you want customers to add special instructions or notes that flow through to the order in Sage 300.
What it does:
Customers can add comments at two levels:
- Order comments: Overall instructions for the entire order (such as delivery preferences or general notes)
- Line item comments: Item-specific instructions for each product in the cart (such as customization details or special handling requests)
Both comment types are passed through to Sage 300 when the order is created, so your team can see the customer's instructions directly in the ERP system.
Set it up:
For order comments:
- Create a custom field for orders named "Comments" (or your preferred label)
- Make the field visible on the checkout page
- Map the custom field to the Sage 300
OrderCommentfield in the order integration
For line item comments:
- Enable the line comment feature for your store
- The comment field appears on each line item in the customer's cart
Using it day-to-day:
When a customer places an order with comments:
- Order comments appear in the
OrderCommentfield in Sage 300 - Line item comments appear in the
OrderCommentsInstructionssection of the Sage 300 order, linked to the specific detail line via the detail number - Each line item comment is stored with a reference to which product it applies to
Customers see:
- A comment field on the checkout page for overall order instructions
- A comment field on each line item in their cart for product-specific notes
Edit existing orders and add line items
Where to find it: Order detail page → Edit Order button
When you'd use this: When a customer needs to modify an order after it's been placed, such as adding additional products, changing quantities, or updating line-level details. This is available for stores integrated with Sage X3 and Business Central.
Using it day-to-day:
When editing an order:
- Navigate to the order detail page
- Click the Edit Order button
- To add a new line item, click Add Line and search for the product by item code
- Select the item from the search results
- The platform automatically retrieves the current price, unit of measure, and tax information for the selected item
- Adjust quantities or other line details as needed
- Save the changes to update the order
What happens when you add items:
- The system pulls the current pricing and unit of measure for each product you add
- Unit prices and tax amounts are calculated automatically based on the item's current pricing
- The order total updates to reflect the new line items
Changing the product on an existing line:
For Business Central integrations, you cannot change the item code on a line that already exists. The item code field is read-only to maintain data consistency with Business Central. If you need to change the product:
- Delete the existing line item
- Add a new line with the correct product
- The new line allows you to select any item code
You can still update quantities and other details on existing lines — only the item code itself is locked.
Troubleshooting:
- Edit Order button shows an error message — If you see a message that the order or cart is not found, the order may have failed to sync with your ERP system or the order data is unavailable. Contact your site administrator to resolve the issue.
Reorder products from past orders
Where to find it: Order detail page → Reorder button
When you'd use this: When a customer wants to quickly add all items from a previous order back into their cart, saving time on repeat purchases.
Using it day-to-day:
When a customer clicks Reorder on a past order:
- The platform retrieves all items from the original order
- Each item is added to the customer's cart with current pricing and availability
- The customer can review and adjust quantities before checking out
What happens with variant products:
If the original order contains products with variants (such as size, color, or other options), the platform adds the specific variant that was ordered:
- Items with variants are matched to the exact combination that was purchased
- Each variant is added as a separate line item in the cart with the correct options selected
- Current pricing, stock levels, and unit of measure information are retrieved for each variant
Troubleshooting:
- "One or more product(s) in your cart are no longer available and thus has been removed" — One or more items from the original order are no longer available in the catalog or are out of stock. The platform adds only the products that are currently available and removes unavailable items from the reorder. The customer can proceed with the available items or contact your team about alternatives.
View product images on the order confirmation page
Where to find it: Order confirmation page (displayed immediately after checkout)
When you'd use this: Every time a customer completes an order. Product thumbnails appear automatically in the order summary on the confirmation page.
What it does:
After a customer places an order, the order confirmation page displays product thumbnail images alongside each item in the order summary. This helps customers visually verify what they've ordered.
The platform retrieves the product image from your catalog at the moment the confirmation page loads:
- Standard products and ERP variants: The product's own image appears
- Product variants (items with size, color, or other options): The specific variant's image is displayed, with a fallback to the parent product's image if the variant has no image of its own
- Custom or ad-hoc line items: The platform attempts to resolve the image by the generated item code
- Products with no image: Your store's default product image placeholder is used
- Items not found in the catalog: No image is displayed
Using it day-to-day:
When a customer views their order confirmation:
- Product thumbnails appear next to each line item in the order summary
- The images match what the customer saw during checkout in their cart
- If a product image is temporarily unavailable (for example, due to a catalog service interruption), the confirmation page still displays without error — the image simply won't appear for that item
Troubleshooting:
- Product images appear as placeholders — The product may not have an image assigned in your catalog, or the item code may not match any catalog entry. Check that the product has a main image configured. If the product exists in your catalog with an image but still shows a placeholder, contact your site administrator.
- Images appear in the cart but not on the confirmation page — If product images display correctly during checkout but are missing on the order confirmation, there may be a temporary issue retrieving data from the catalog. The order itself is not affected — only the display of images on the confirmation page.
Use the ship-to address location for order fulfillment (Business Central)
Where to find it: Admin → Store Settings → Order Settings → Use ship-to address location for orders
When you'd use this: When your store is integrated with Business Central and you need orders to be fulfilled from the warehouse that corresponds to the customer's shipping address, rather than from the warehouse assigned to the ordering user's account.
What it does:
By default, orders in Business Central use the ordering user's primary warehouse as the fulfillment location. When you enable this setting, the platform sends the ship-to address's warehouse location to Business Central instead.
This ensures that orders are fulfilled from the warehouse closest to or responsible for the delivery address, which is especially important when:
- Your ordering users are based in one location but ship to multiple regions
- Different warehouses serve different geographic areas
- The ship-to address is registered in Business Central with a specific location code
How the location is determined:
When a customer places an order:
- The platform looks up the ship-to address in Business Central
- Business Central returns the location code associated with that address
- If this setting is enabled, that location code is sent with the order for both the order header and all line items
- If this setting is disabled, the ordering user's primary warehouse is used instead
Set it up:
- Navigate to Admin → Store Settings → Order Settings
- Enable the "Use ship-to address location for orders" feature
- Configure your order integration transform to map the ship-to location field to the appropriate Business Central field
- Save your changes
Using it day-to-day:
Once enabled:
- Orders automatically route to the correct fulfillment location based on the shipping address
- The location code appears in both the order header and on each line item in Business Central
- If the ship-to address does not have a location code in Business Central, the system falls back to the ordering user's primary warehouse
Troubleshooting:
- Orders still show the wrong warehouse — Verify that the ship-to address is registered in Business Central with the correct location code. The platform can only send the location if Business Central returns one during address lookup.
- Location field not appearing in Business Central — Check that your order integration transform maps the ship-to location field. This setting makes the location available to send, but your transform controls whether it's included in the order request.
Resend failed orders
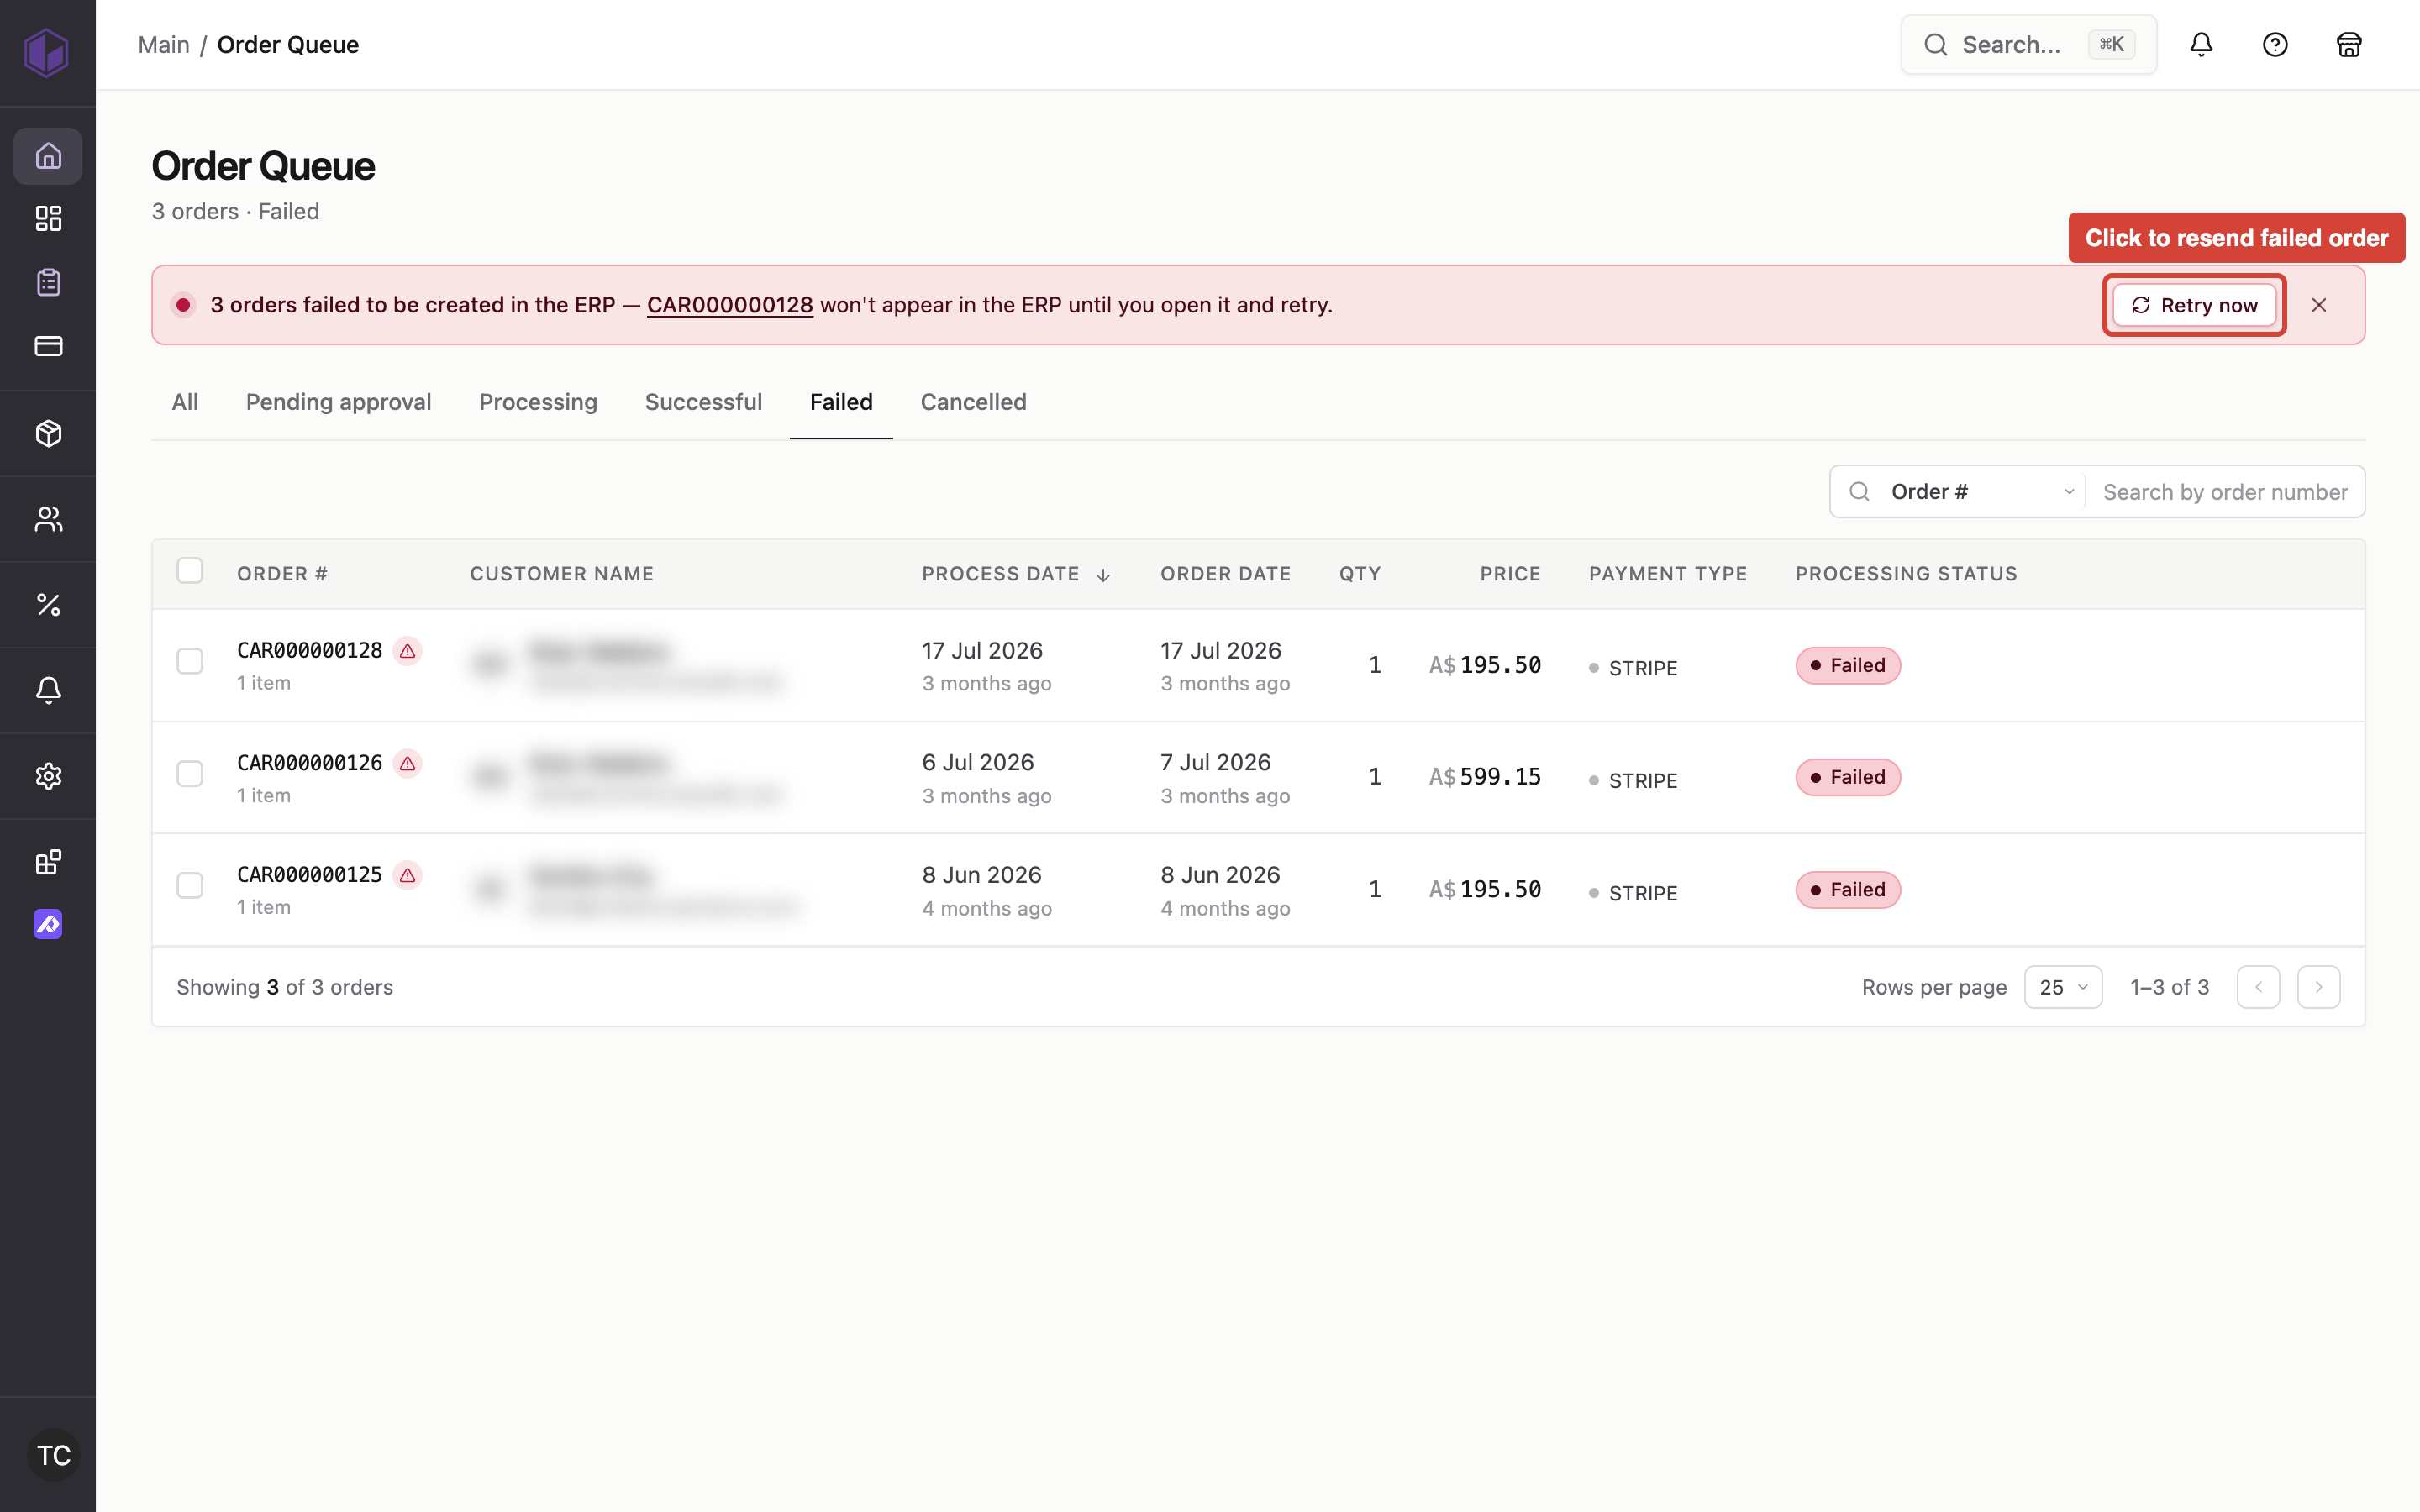
Where to find it: Admin → Orders → Failed order detail page → Resend button
When you'd use this: When an order fails to send to your ERP system due to a temporary issue, such as a network outage or a brief ERP service interruption.
Using it day-to-day:
If an order appears in the Failed orders list:
- Navigate to the failed order detail page
- Click the Resend button to retry sending the order to your ERP system
- The platform attempts to create the order again with the original details
What happens when you resend:
- The platform sends the order request to your ERP system using the same information from the original checkout
- If your store uses address lookup to validate or retrieve shipping addresses from the ERP, the platform performs the address lookup again when resending the order
- If the ERP system is available and accepts the order, it moves from Failed to the normal order queue
- If the order fails again, it remains in the Failed list and you can review the error details
Troubleshooting:
- Order fails again after resending — If the order continues to fail after the ERP system is back online, the issue may be with the order data itself (such as an invalid product code, pricing issue, or missing address information). Review the error message on the order detail page and contact your site administrator if the cause isn't clear. The platform ensures that the original order failure reason is preserved even if internal notification systems encounter errors.
- Address-related errors when resending — If the failed order had address validation errors and you resend it, the platform re-validates the shipping address with your ERP system. This ensures that address information is current and properly formatted for order creation. If the address is still invalid, the error message will indicate the specific issue.